Connection
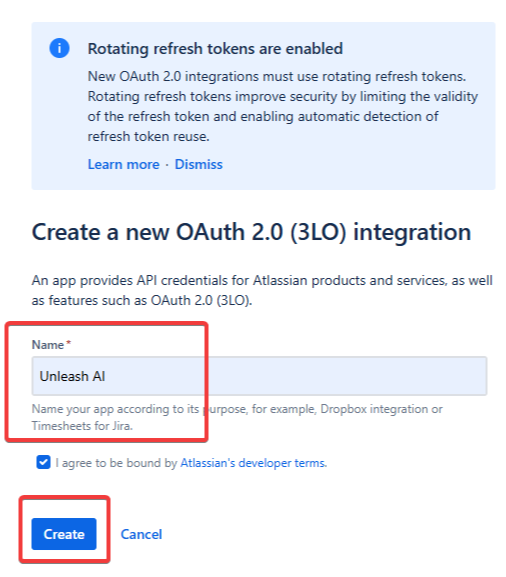
Go to the Atlassian Developer Console to create a new OAuth2 app at - https://developer.atlassian.com/console/myapps/.

Name your application
Unleashand proceed to the next step.

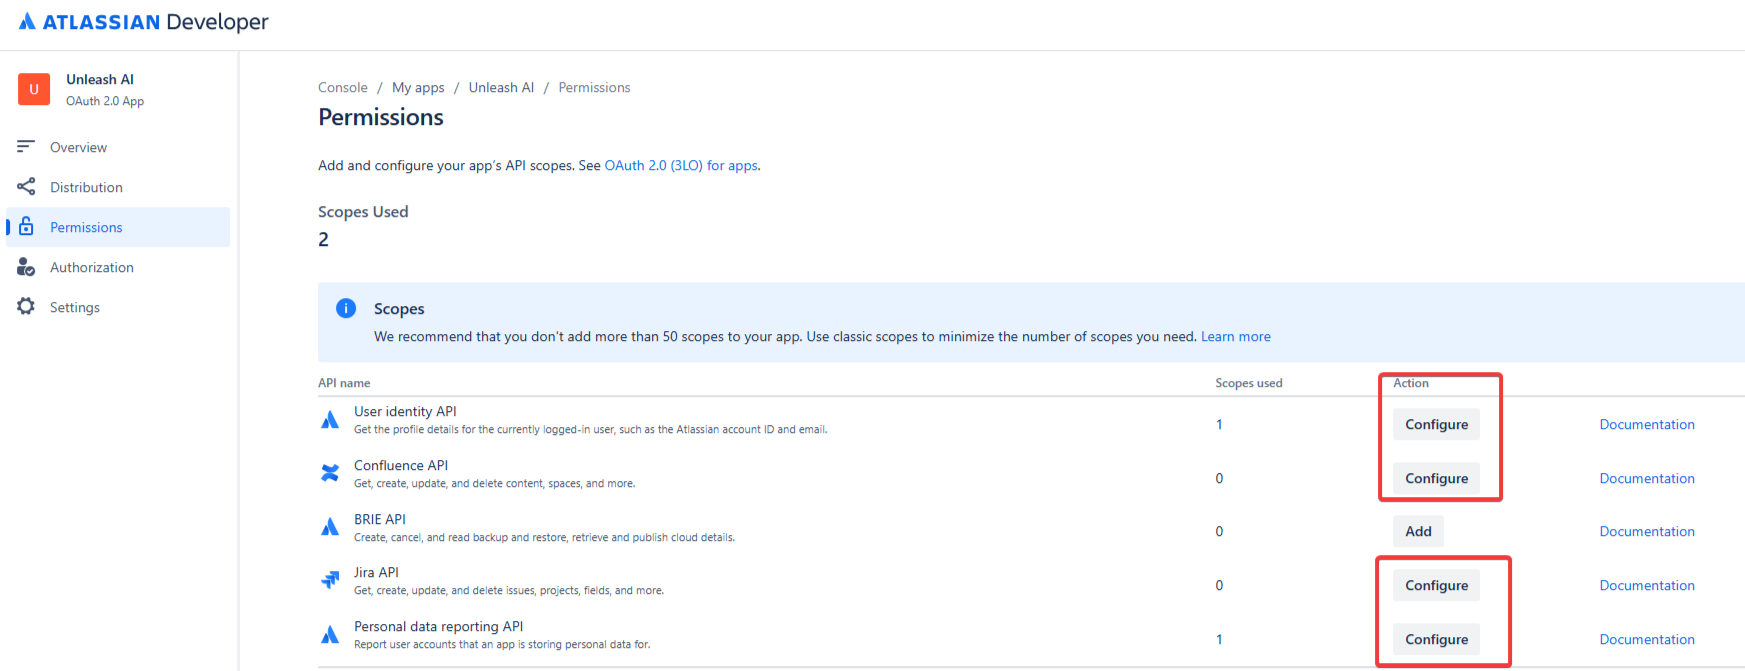
In the Permissions screen, enable the following permissions for Atlassian apps:
For both Confluence and Jira, add:
User Identity API
Personal Data Reporting API
For Confluence, add:
Confluence API
For Jira, add:
Jira API

For Confluence, click
Configureto add the relevant scopes. Use the following granular scopes:
read:content:confluence
read:content-details:confluence
read:attachment:confluence
read:custom-content:confluence
read:space:confluence
read:content.property:confluence
.png)
For Jira, click
Configureand add the following granular scopes:
read:application-role:jira
read:audit-log:jira
read:avatar:jira
read:dashboard:jira
read:group:jira
read:issue:jira
read:issue-meta:jira
read:attachment:jira
read:field:jira
read:field-configuration:jira
read:issue-details:jira
read:issue-type:jira
read:issue-worklog:jira
read:issue-security-level:jira
read:issue-status:jira
read:issue-type-hierarchy:jira
read:issue.changelog:jira
read:issue.vote:jira
read:user:jira
read:project:jira
read:project-category:jira
read:project.component:jira
read:project.property:jira
read:project-role:jira
read:project-version:jira
read:webhook:jira
write:webhook:jira
delete:webhook:jira
read:workflow:jira
read:status:jira
read:jql:jira
.png)
In the Authorization screen, add OAuth authorization for the app.

Configure the Callback URL with the one shared by your Unleash representative in the Authorization screen.

In the Settings section of the app, copy both the Client ID and Client Secret. Store them securely and share them with your Unleash representative.
.png)

