Cards are the fundamental, bite-sized units of knowledge in Unleash. Cards are organized into Wikis and can be further placed in a relevant folder within an Unleash workspace. Unlike long documents, cards are optimized to make knowledge easy to search and quickly accessible for your team when they need it. They are also used as data sources to answer the questions you ask in Unleash. The ability to implement edits post-publishing and implement verification intervals simplifies knowledge management.
Creating Cards
To create a card:
Open the
.png) Wikis page.
Wikis page.Click + Create New.
Click New Card.
Select a wiki to add the card to.
Optional: Select a folder within the wiki to add the card to. If there is no folder within the wiki, you can click + Create New in the folder box to create a new folder.
Click Create.
Give your card a name.
Type the body of the card, adding any necessary formatting.
You can attach resources to your card. The number of files you can attach is unlimited, but each file must be under 50MB.
Files
Links
Images
Videos
Tables
Code Snippets
Click Publish.
You can also click out to create a draft.
Optional: Add Tags. Tags can only be added to published cards.
When searching for a file in Unleash, the card containing your uploaded file will appear as a search result. If the wiki where the card is located is set as a data source for any of the assistants, the file will be displayed as an answer when relevant to a question.
Moving Cards to Different Wikis
Sometimes, a card may better suit a specific category within another wiki or folder. In such cases, you can move the card to the appropriate wiki.
Note: When a card is moved to a different wiki, the verification policy of the destination wiki will be adopted.
To move a card to a different wiki:
Navigate to the card you would like to move.
Click on the three-dot menu of the card.
Click
 Move to.
Select Wiki to add the card.
Optional: Select a folder within the wiki to add the card to. If there is no folder within the wiki, you can click + Create New in the folder box to create a new folder.
Click Move.
Editing Cards
When you edit a published card and decide not to publish your changes immediately, your edits are automatically saved as a draft. These drafts will appear in your "My Drafts" section but won't be indicated as drafts within the wiki itself. When viewing the wiki, you'll see the original version of the card without your changes. Only when you click "Edit" will your saved changes be visible.
If another editor opens the same card to edit it, they will see the draft with your changes, allowing them to collaborate on the updates before anything is finalized. Editors can view and work together on each other's drafts within this shared editing space. Once all changes are finalized, you can publish the draft to update the existing card. Learn more about drafts.
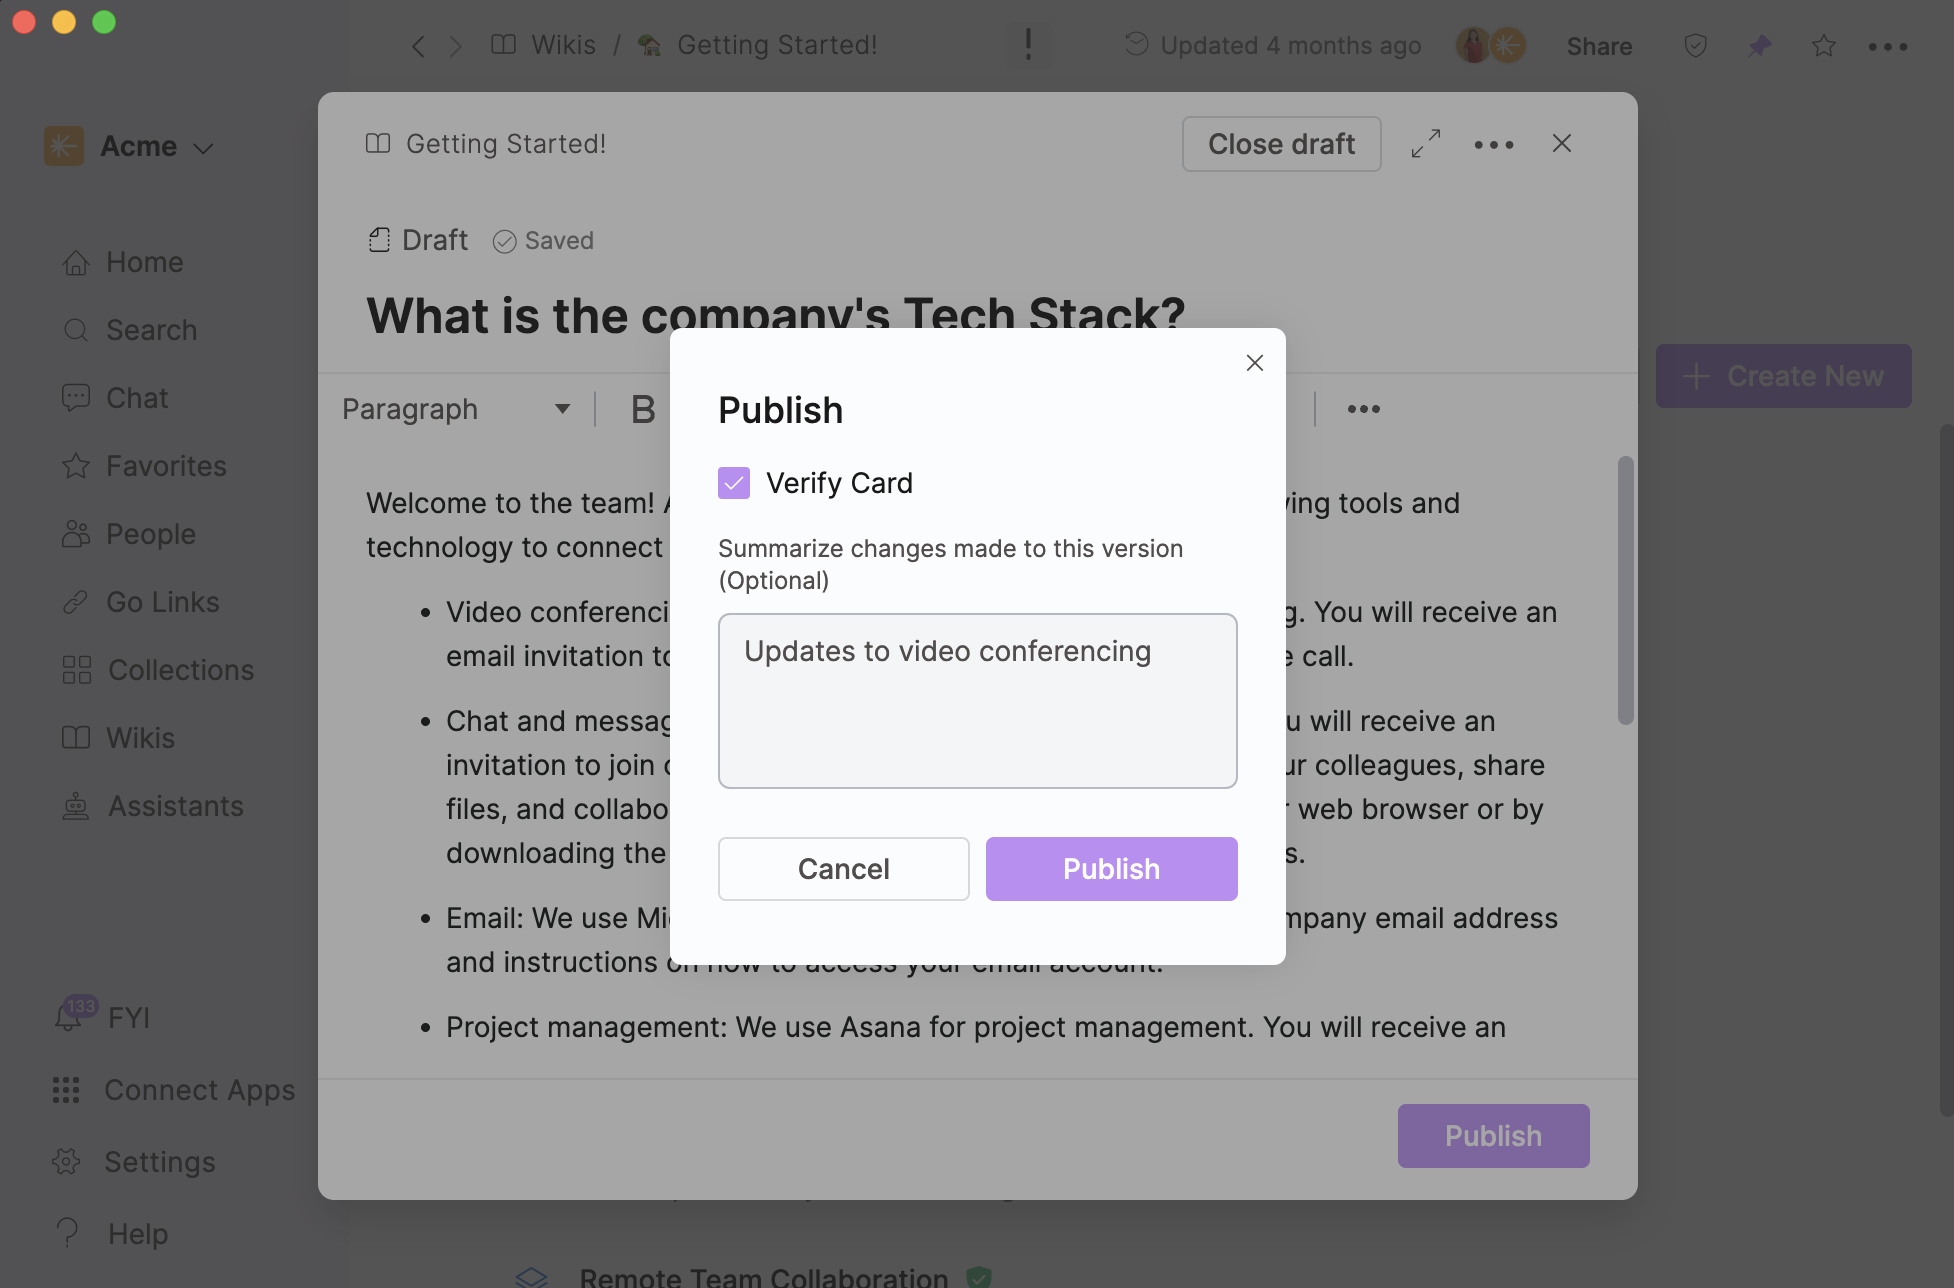
Whenever you make and save edits to a card, a new version is automatically created. A pop-up will prompt you to summarize the changes made in that version. Once you click Publish, the changes will be recorded in the Previous Versions tab. Note that only Wiki editors and Card editors have access to view the version history.

Card Version History
Wiki editors can track and manage changes made to a card throughout its lifecycle and quickly compare the current version of a card with previous iterations to see what’s been modified.
Reviewing Previous Versions
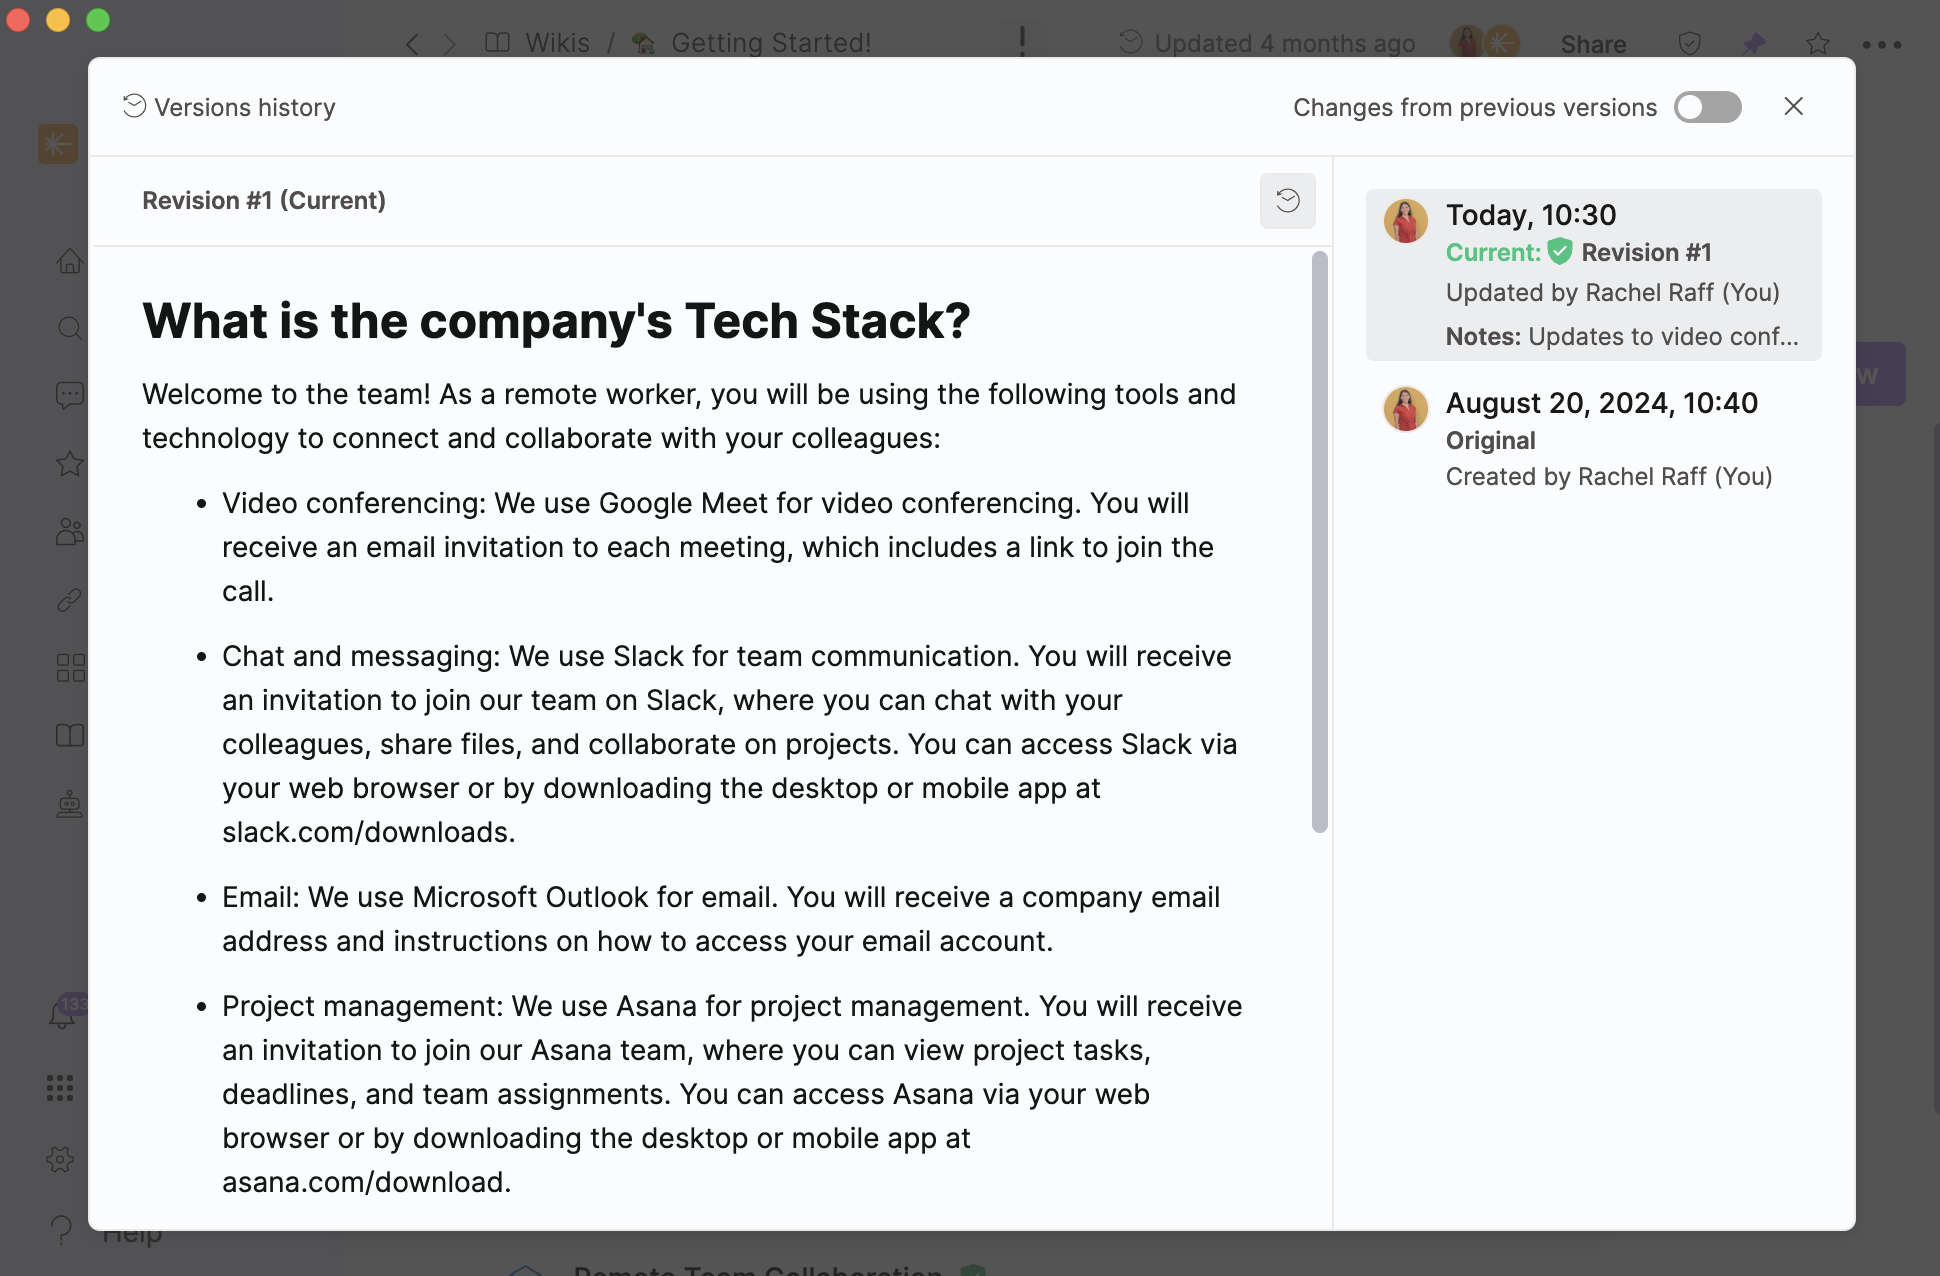
Reviewing previous versions opens a side tab displaying a detailed list of all published revisions made to the card during its lifetime. The list includes:
Card creation time
Creator’s name
Creation date of the original card
Revision number
Name, avatar, and timestamp of the user who made the changes
Option to restore the revision
To view previous versions:
Open a card.
Click on the three-dot menu on the top right.
Click
 Version History.
The version history will open in a side tab.
To close the tab, click the
 icon on the left-hand side of the panel.

To restore a previous version:
Open a card.
Click on the three-dot menu on the top right.
Click
 Version History.
Click on the version you would like to restore.
Click the Restore Version button.
A new revision will be created with the restored changes.
Comparing Versions
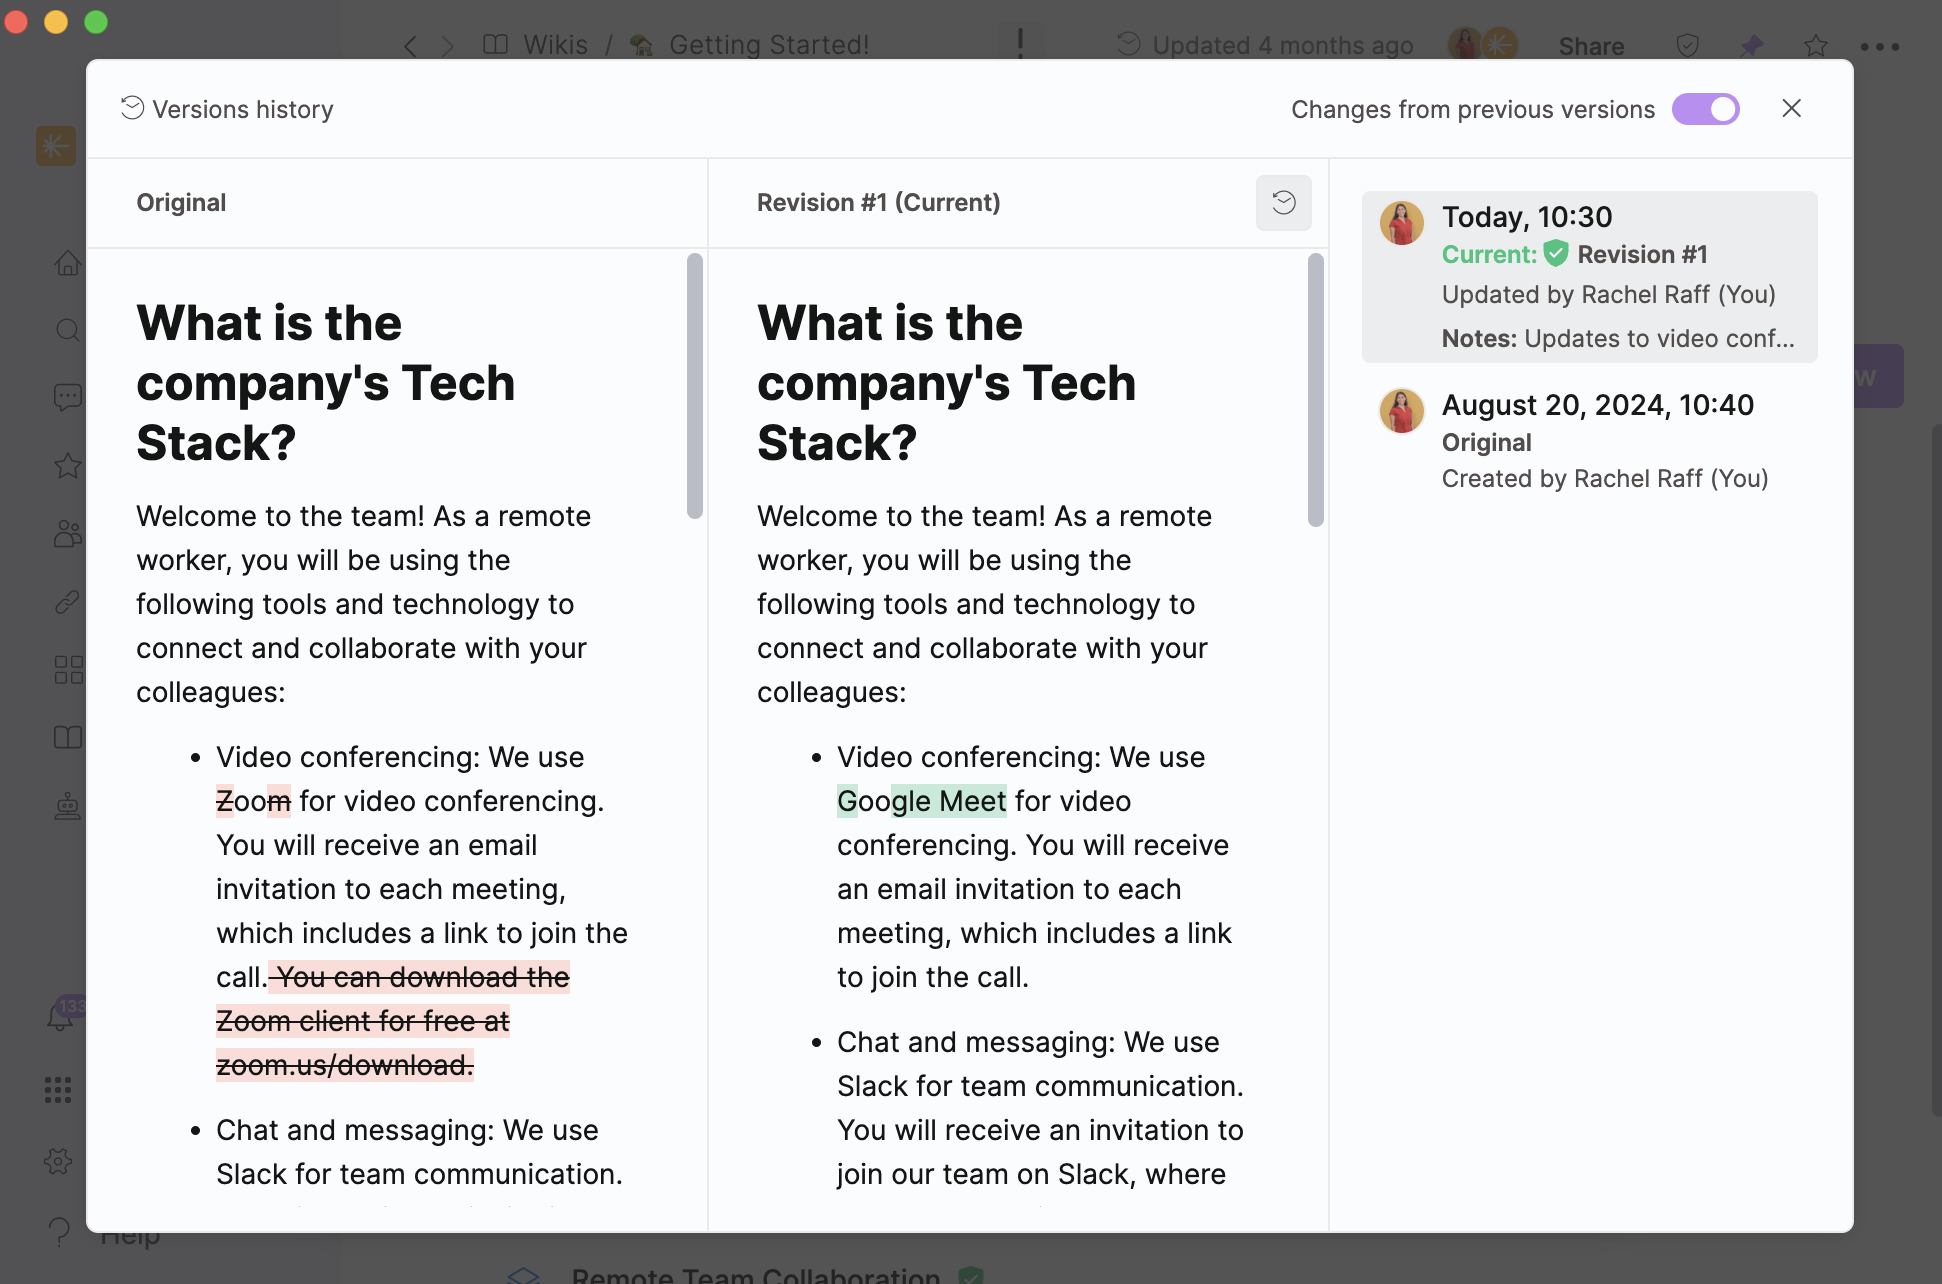
Compare changes between two successive versions of a card. The comparison highlights:
Textual changes
Attachment changes
Changes are color-coded for clarity:
Red: Deleted content
Green: Added content
To compare versions:
Open a card.
Click on the three-dot menu on the top right.
Select
 Version History.
Toggle Compare to Previous Versions on.
The page will split into two views, showing the previous version alongside the current version.

