Connecting Google OAuth App
Create a new project
To add a Google OAuth app, you will need to create a dedicated project for Unleash in your Google Cloud Console. You can do this by visiting the following URL: https://console.cloud.google.com/projectcreate.
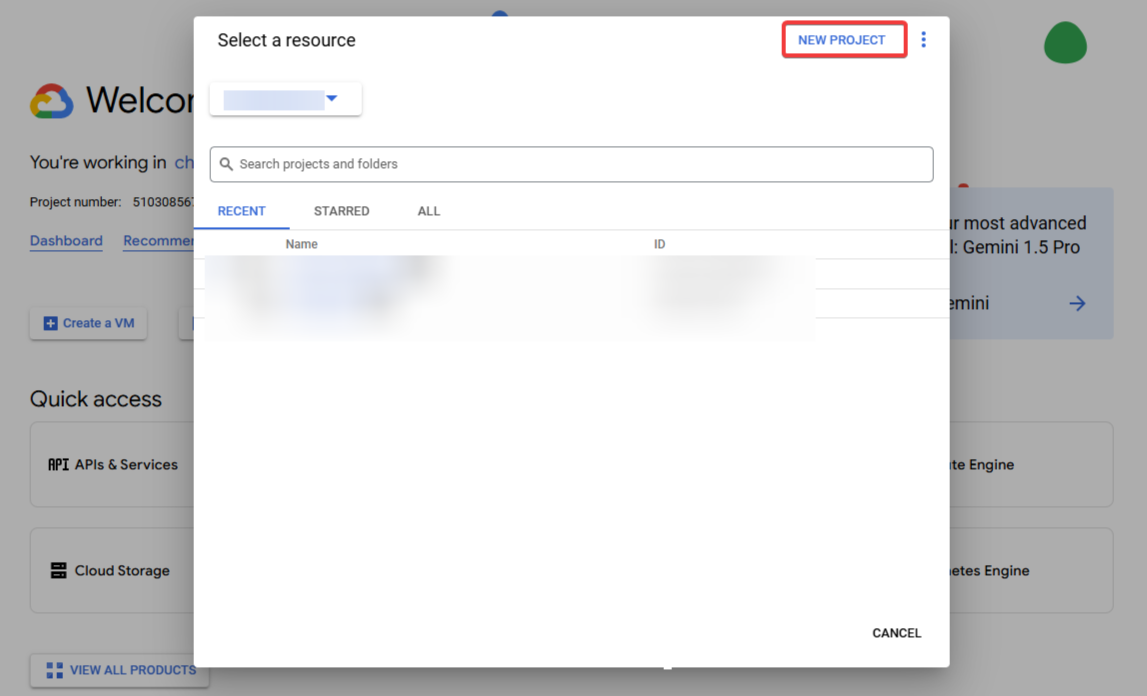
Name your project unleash-integrations and click Create.

Enable API services
Select your newly created project, then navigate to the API & Services section by visiting this link.

For Google Drive Enable:
Google Drive API (https://console.cloud.google.com/apis/api/drive.googleapis.com)
Admin SDK API (https://console.cloud.google.com/apis/api/admin.googleapis.com)
People API (https://console.cloud.google.com/apis/api/people.googleapis.com)
For Gmail Enable:
For Google Calendar Enable:
Google Calendar API https://console.cloud.google.com/apis/api/calendar-json.googleapis.com
For Google People Directoy Enable:
Your Enabled APIs screen should look like this:
.png)
Configure the OAuth Consent Screen
Create a new internal screen.
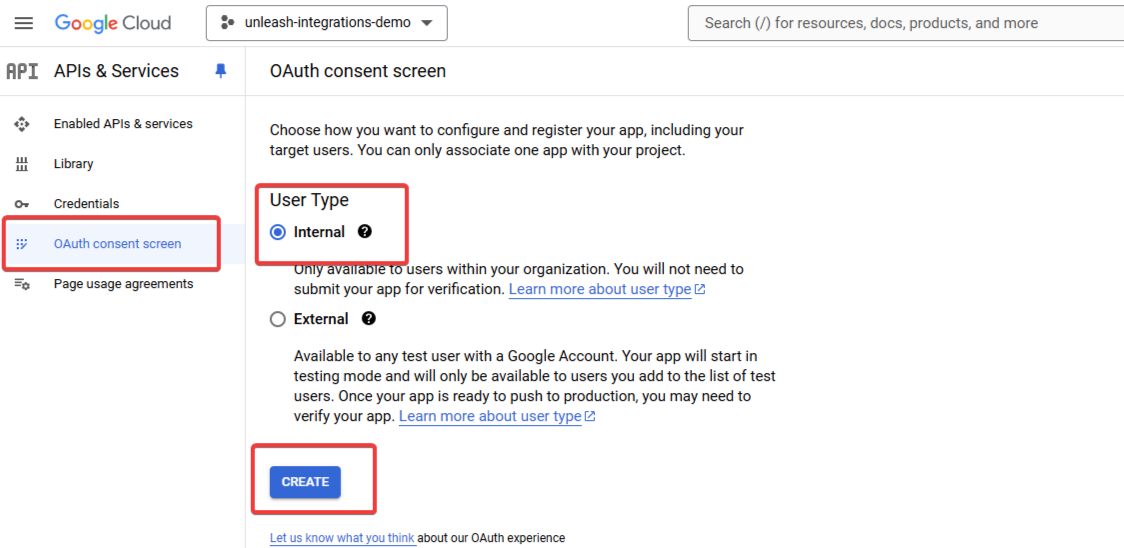
Fill in the required App Information:
Name - Unleash
Support email
Developer Contact Information
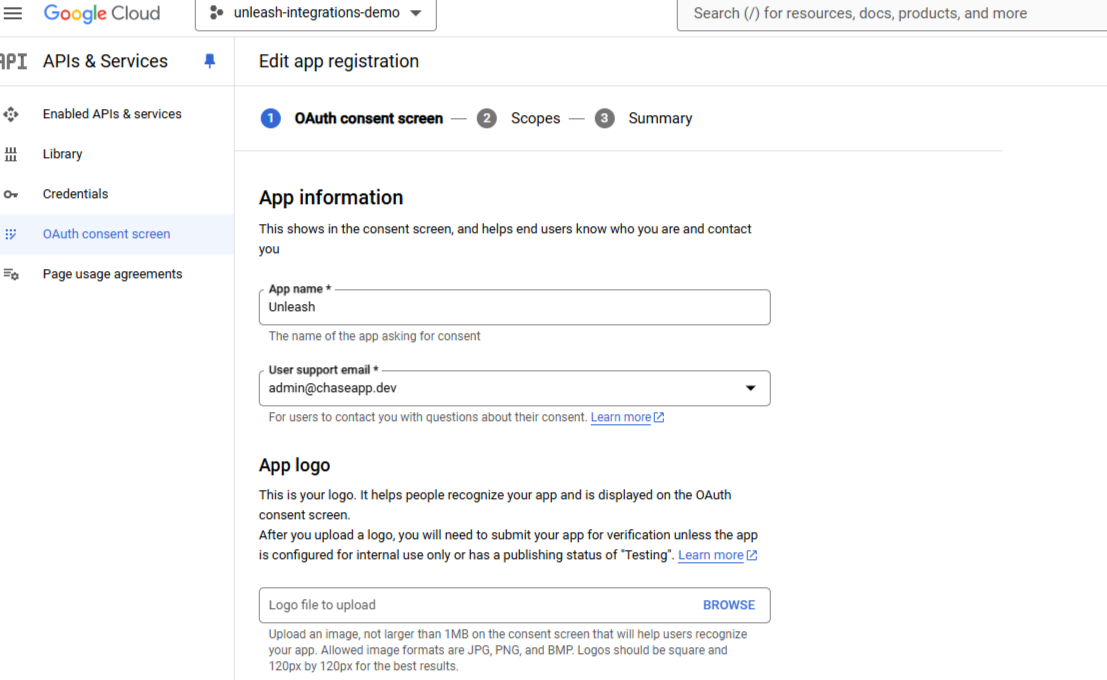
Configure the relevant scopes.
For all applications, add:
openid
/auth/userinfo.email
/auth/userinfo.profile
For Google Drive, add:
/auth/admin.directory.user.readonly
/auth/admin.directory.domain.readonly
/auth/admin.directory.group.readonly
/auth/contacts.readonly
/auth/drive.photos.readonly
/auth/drive.readonly
/auth/drive.metadata.readonly
/auth/drive.activity.readonly
For Gmail add:
auth/gmail.readonly
For Google Calendar, add
/auth/calendar.readonly
For Google People Directory, add
/auth/contacts.readonly
/auth/directory.readonly
Creating Credentials
Create a new OAuth Credential at https://console.cloud.google.com/apis/credentials/oauthclient.
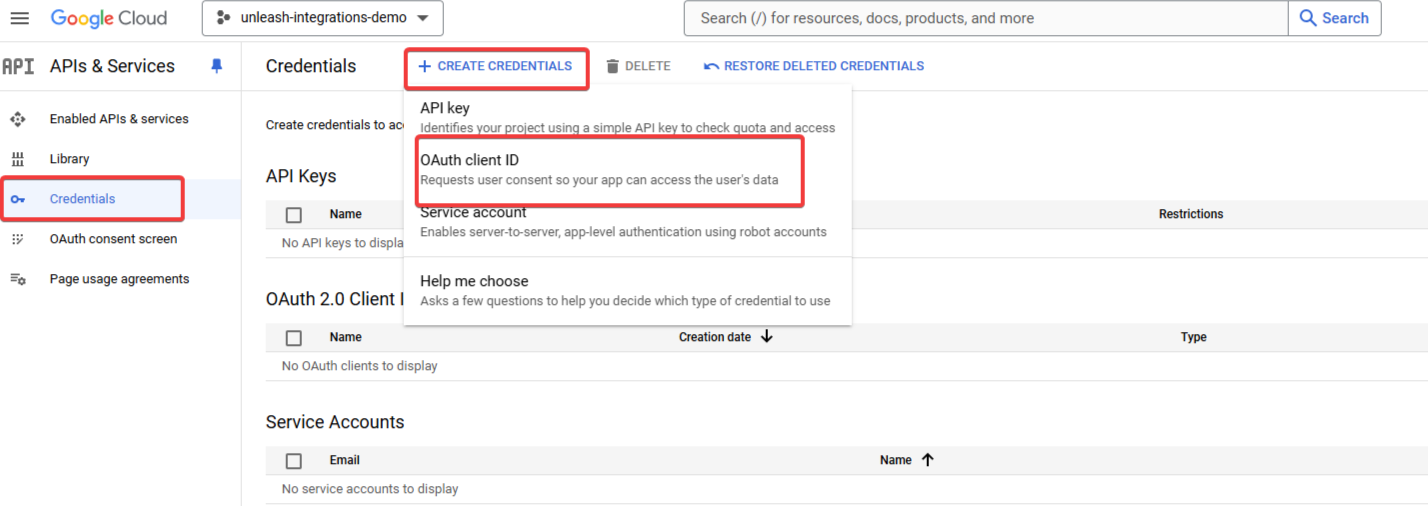
Select the app type as Web Application.
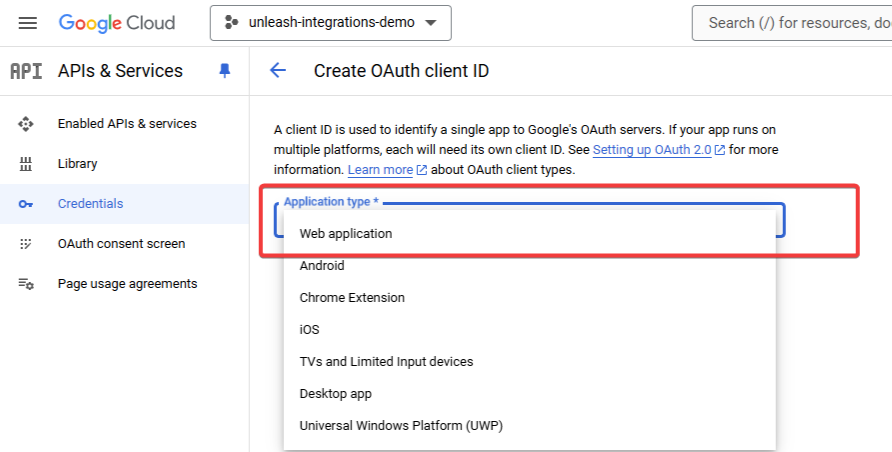
Name your app Unleash and add the Callback URL provided by your Unleash representative.
.png)
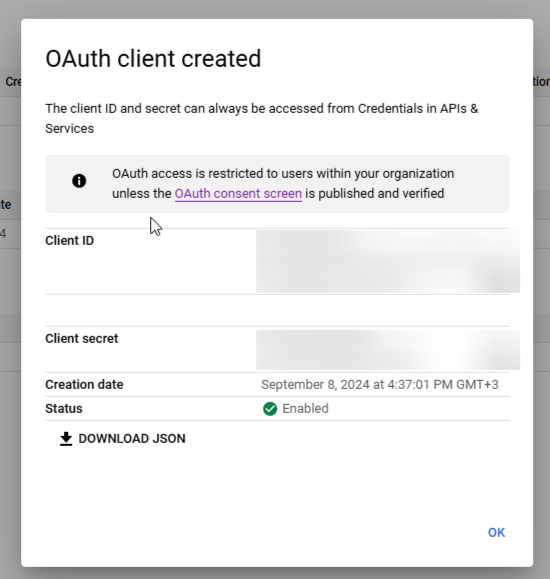
Copy your newly created credentials (Client ID and Client Secret), store them securely, and share them with your Unleash representative.
Link Provisioning
To support link provisioning in your environment, you must also generate Service Account Credentials.
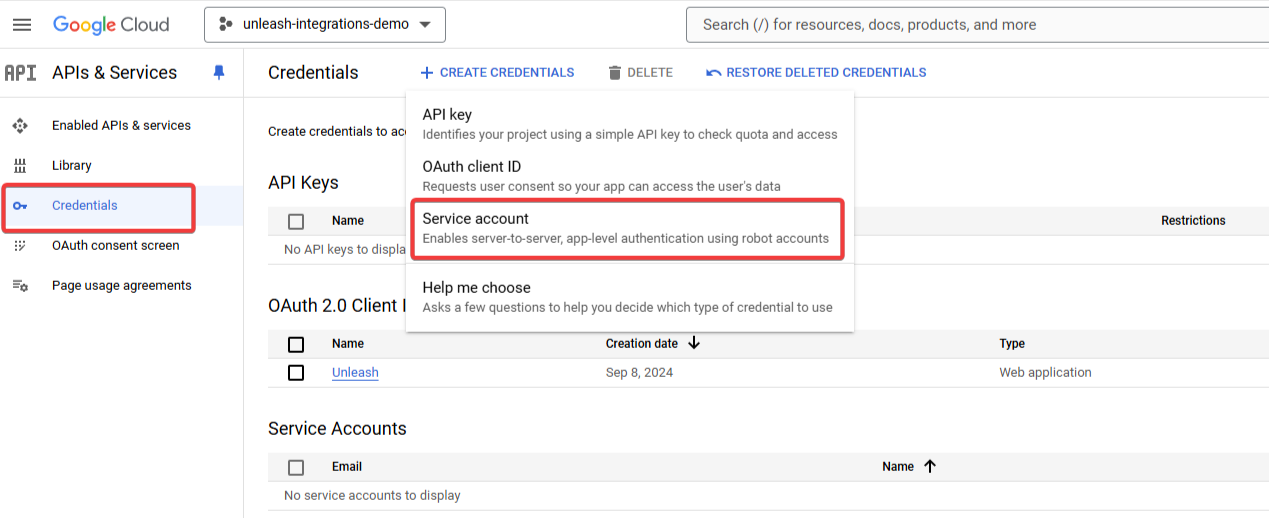
Name your app and create the service account.
.png)
Click it

Create a new JSON key pair
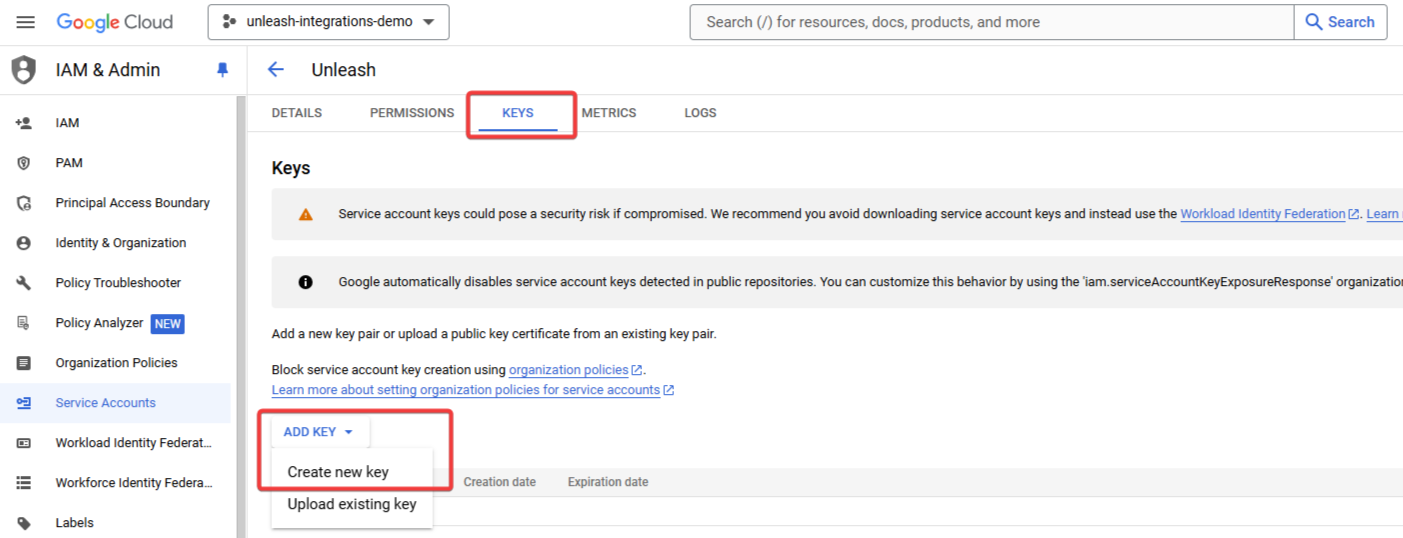
Download the JSON file and share it with your Unleash representative.
.png)

