This guide will instruct you on integrating your OKTA directory with Unleash.
Step 1 - Creating an App
In the Applications section of your Okta admin console, create a new API Services app
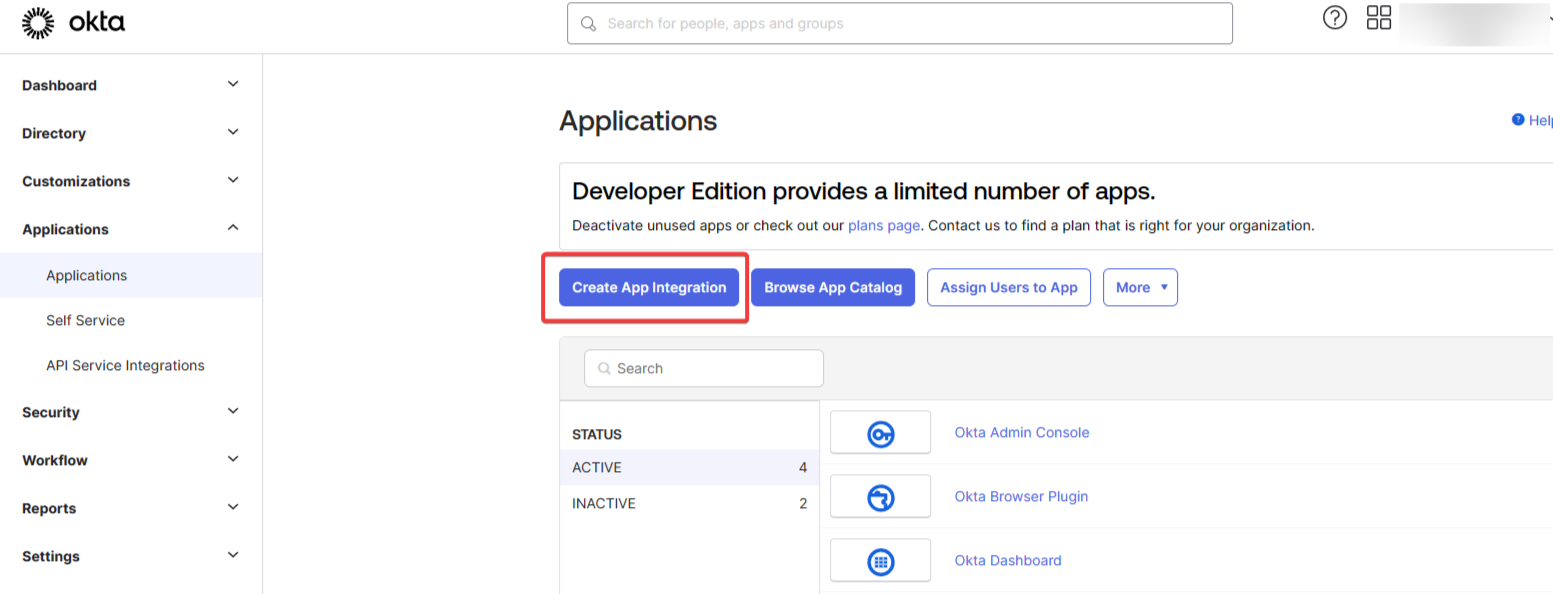
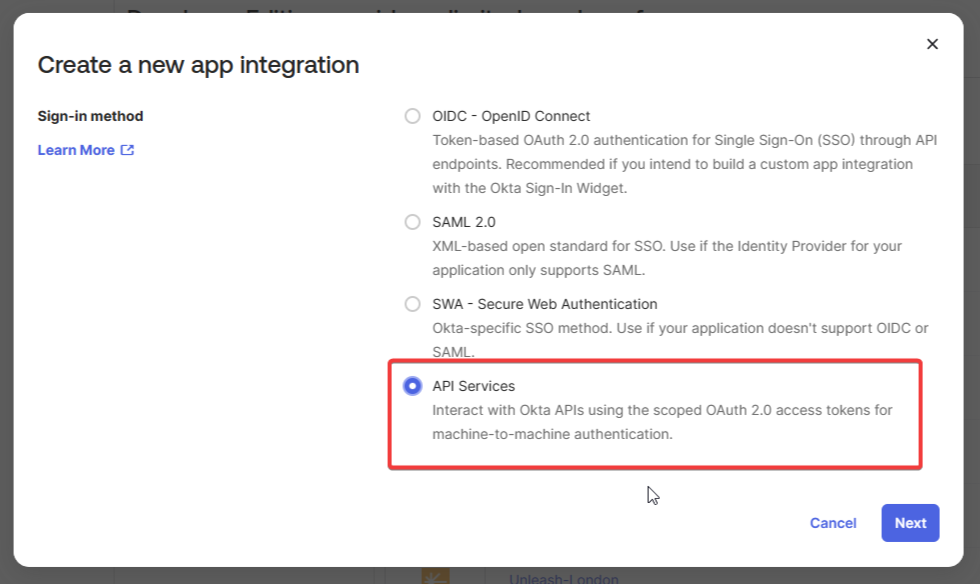
Name your app Unleash Admin

Step 2 - Config Scopes
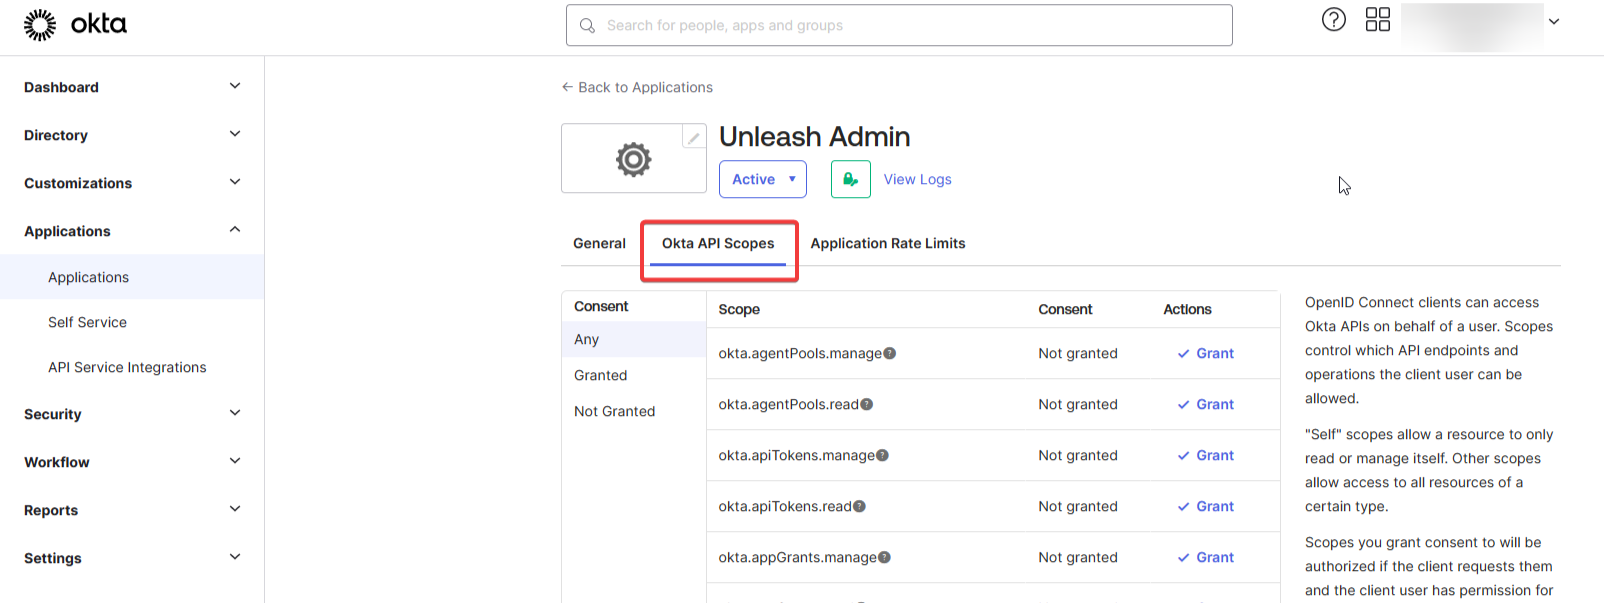
Now that the integration is created, go to the OKTA Api Scopes tab and grant access to the following scopes:
okta.users.readokta.groups.read
Step 3 - Config Credentials
Go to the General tab and edit the Client Credentials section:
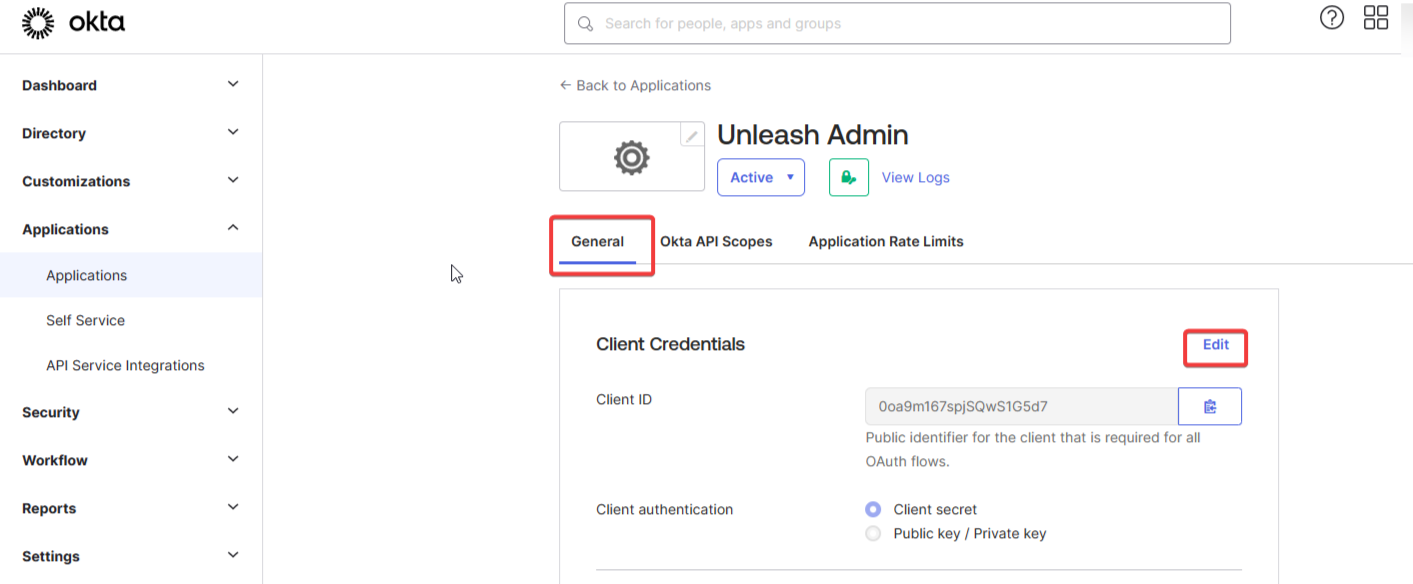
Change the Client authentication type to Public key/Private Key:
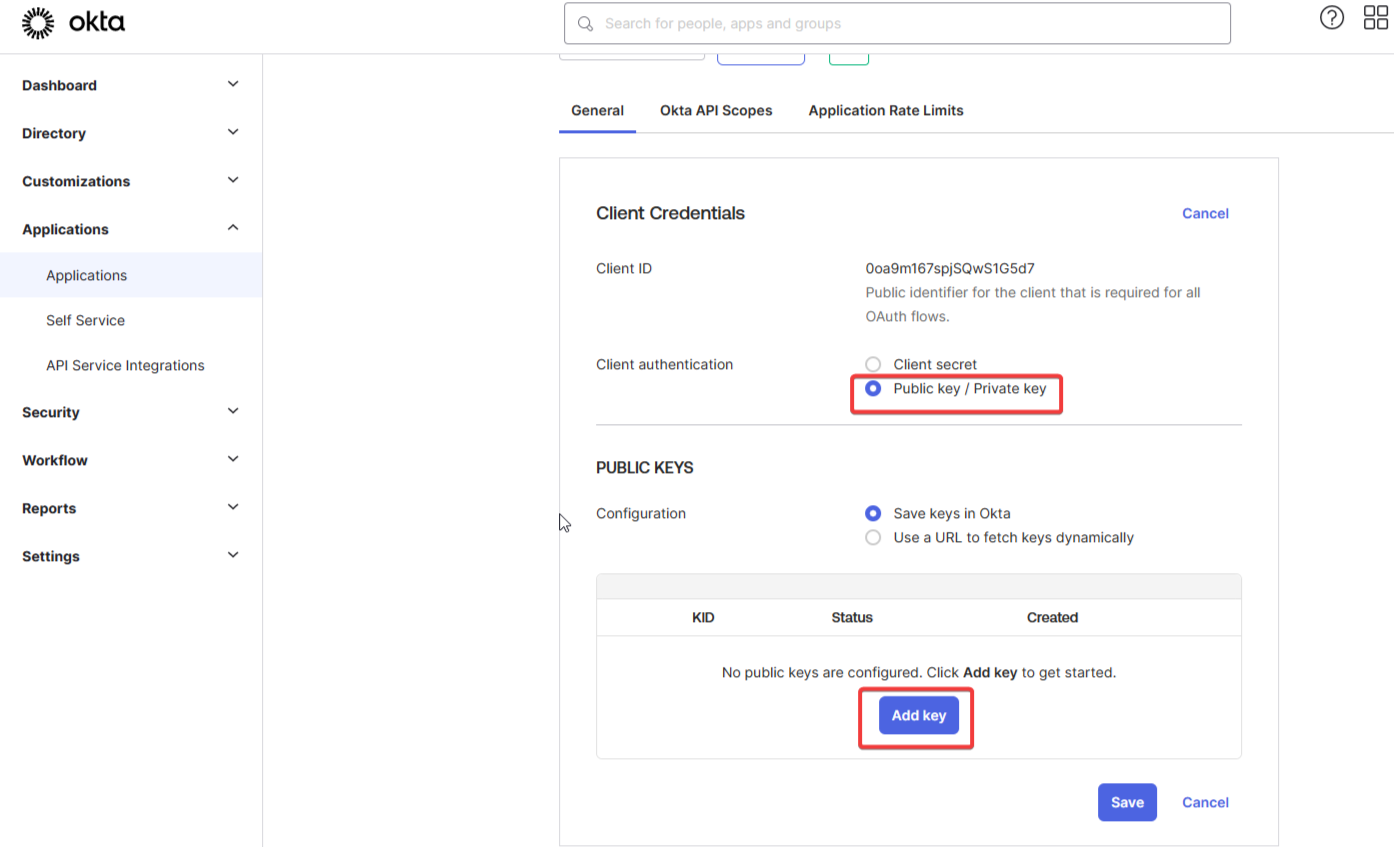
Add generate a new key:
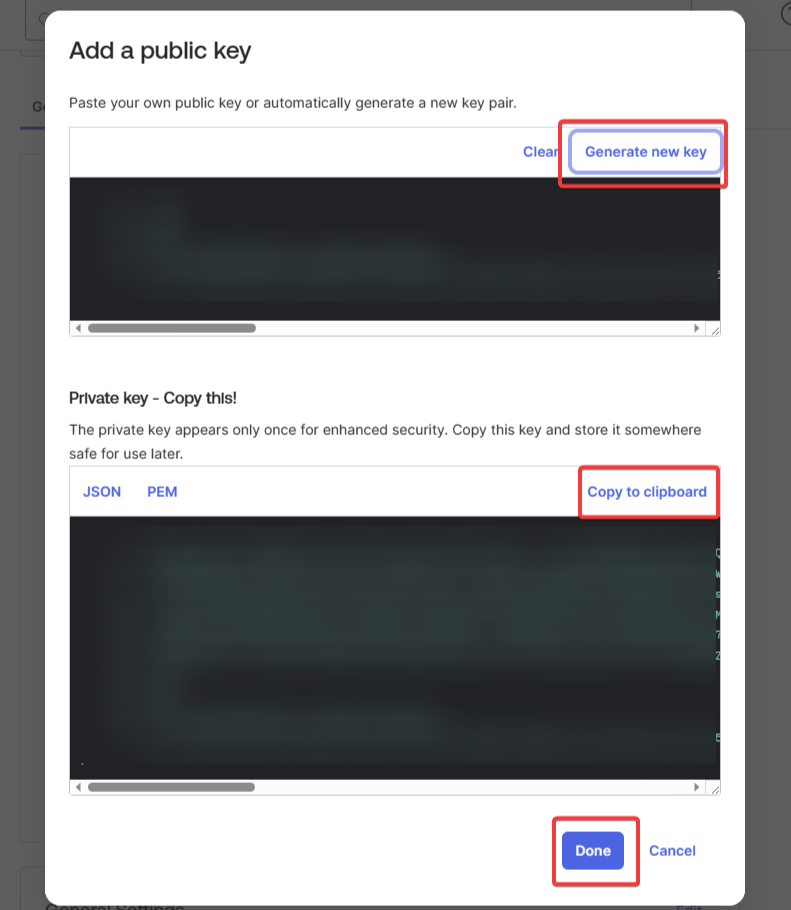
Copy the private key and save the new key pair:
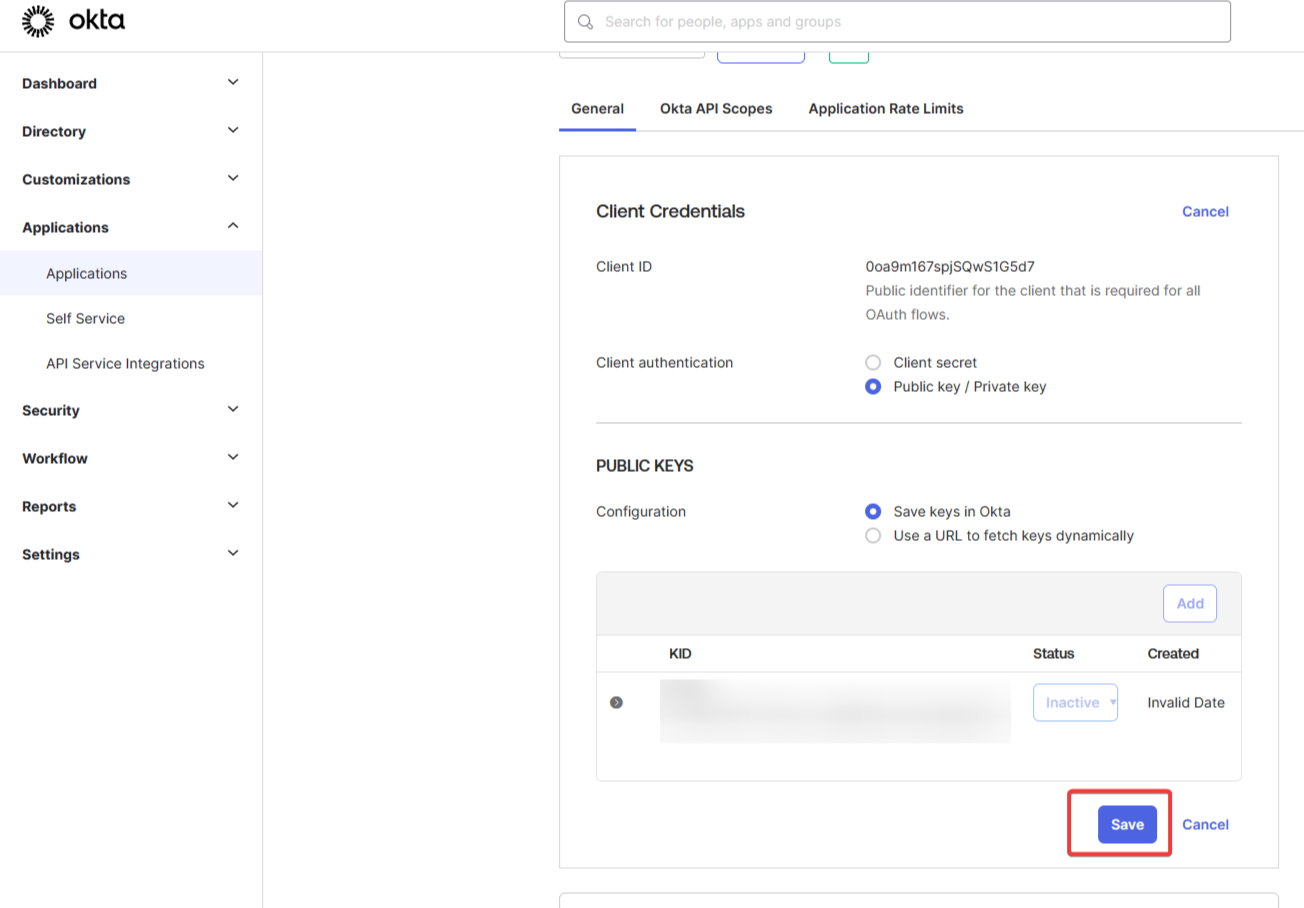
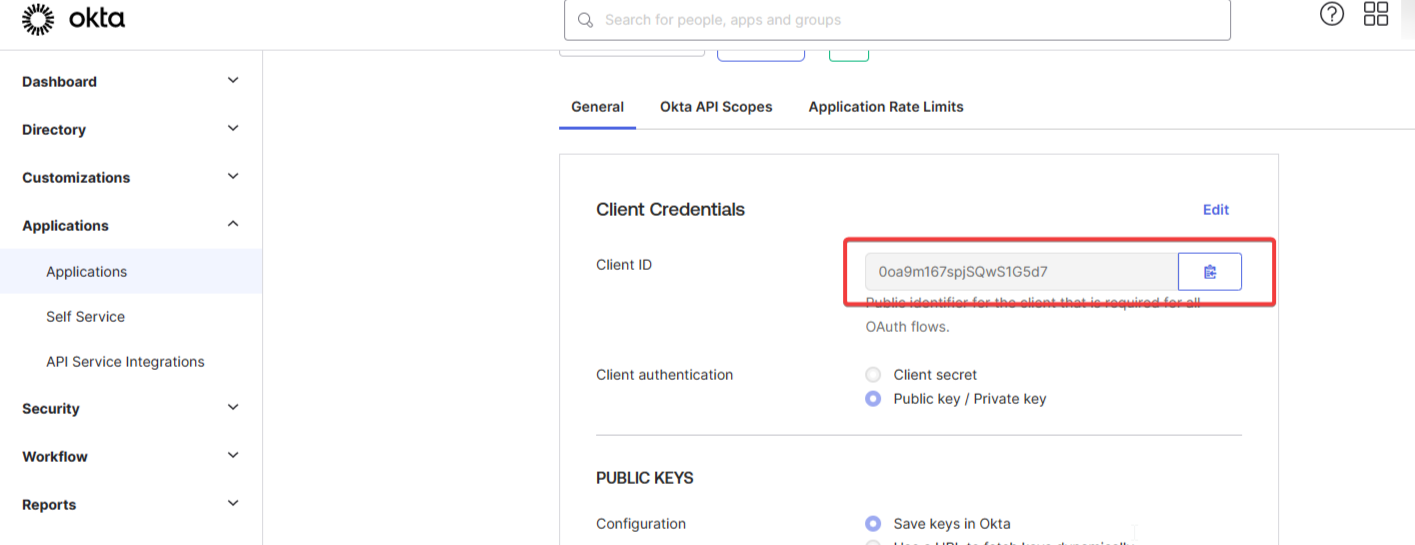
Finally, share the new Private Key and Client Id with your Unleash representative, so that they may complete the configuration for your Unleash workspace:
